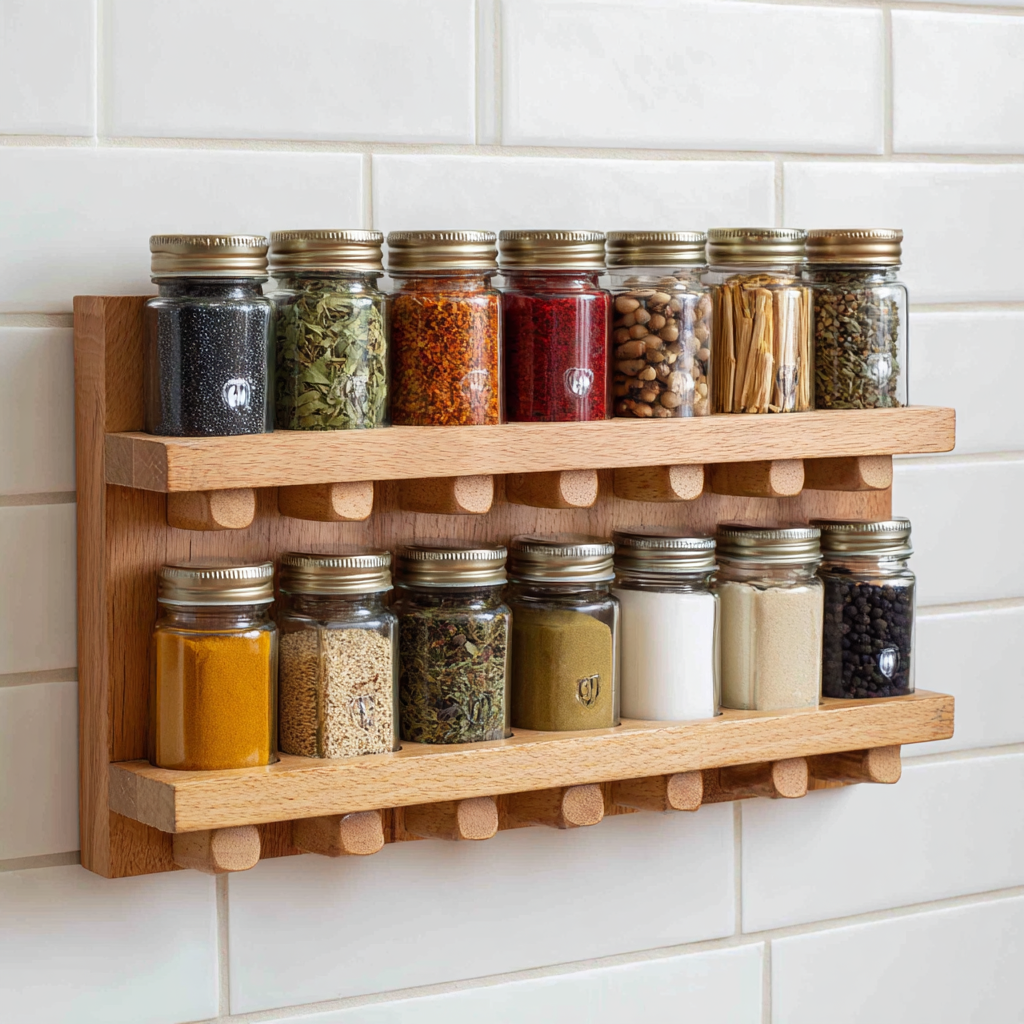
In this tutorial, I’m showing you how to build a beautiful wall-mounted wooden spice rack that will keep your kitchen organized and add rustic charm to your cooking space! This project makes an excellent handmade gift for weddings, housewarmings, or anyone who loves to cook.
The best part? You can build this entire spice rack from a single board! It’s one of those satisfying weekend projects that looks far more impressive than the effort required.
This spice rack was incredibly rewarding to build, so let’s get started with the details.
This post contains affiliate links for your convenience.
Things to Know Before You Start
This is a beginner-friendly project that takes about two to three hours of hands-on time, not including drying time for glue and finish.
Choosing the Right Wood
You can use virtually any wood species for this spice rack, but I recommend hardwoods for durability and appearance. Great options include oak, maple, walnut, cherry, or birch.
Cedar is another excellent choice because it naturally repels insects and adds a pleasant aroma to your kitchen.
Avoid using treated lumber or plywood for this project. Stick with solid, untreated wood that’s safe for use near food items.
For this build, I used red oak because I love its prominent grain pattern and warm color. The entire rack was made from a single 1×6 board that was 6 feet long.
Hardware Considerations
You’ll need a few mounting options depending on your wall type. For drywall, use proper anchors rated for at least 10 pounds. For studs, standard wood screws work perfectly.
I also recommend using keyhole hangers on the back of the rack for easy mounting and removal. These create a flush mount that looks clean and professional.
The shelf supports can be simple butt joints reinforced with wood glue and brad nails, or you can upgrade to pocket holes for extra strength.
Step-by-Step Guide to Building Your Spice Rack
Tools You’ll Need
- Table saw or circular saw
- Miter saw (optional but helpful)
- Drill and drill bits
- Brad nailer or hammer and finish nails
- Sander (orbital sander recommended)
- Clamps
- Tape measure and pencil
- Speed square or combination square
Materials List
- One 1×6 board, 6 feet long
- Wood glue
- Brad nails or finish nails
- Sandpaper (120, 180, and 220 grit)
- Wood finish of your choice
- Keyhole hangers
- Mounting screws
Step 1: Cut All Your Pieces
Start by cutting your board into the following pieces:
- One backboard: 24 inches long (this is the vertical piece that mounts to the wall)
- Three shelves: 22 inches long each
- Two side supports: 18 inches long
The exact measurements can be adjusted based on how many spice jars you want to store and your available wall space. Just make sure your shelves are about 2 inches shorter than your backboard to create clean edges.
I used my miter saw for all these cuts to ensure they were perfectly square, but a circular saw with a guide will work just as well.
After cutting, I organized all my pieces and gave them a quick sanding with 120-grit sandpaper to remove any rough edges or splinters.
Step 2: Create the Shelf Layout
Lay your backboard flat and mark where each shelf will attach. I spaced mine evenly at 5 inches apart, which perfectly accommodates standard spice jars.
The bottom shelf should sit about 3 inches from the bottom of the backboard, and the top shelf about 3 inches from the top. This leaves room for the mounting hardware and creates a balanced look.
Use a pencil and square to draw light reference lines across the backboard where each shelf will attach. This ensures everything stays level during assembly.
Step 3: Attach the Side Supports
The side supports create a lip that prevents jars from sliding off the shelves. These get attached to the front edge of each shelf before you mount the shelves to the backboard.
Apply wood glue to the edge of each shelf, then position your side support flush with the bottom and ends. Secure with brad nails every 4 to 6 inches.
I used three brad nails per shelf, which provided plenty of holding power. Make sure to wipe away any glue squeeze-out immediately with a damp cloth.
Let these shelf assemblies dry for at least 30 minutes before moving to the next step.
Step 4: Assemble the Rack
Now comes the exciting part where everything comes together! Start with the bottom shelf first.
Apply a generous bead of wood glue along the back edge of your first shelf assembly. Position it on your reference line on the backboard, making sure it’s centered with equal overhang on both sides.
Secure it with brad nails driven through the backboard into the shelf. I used four nails per shelf, evenly spaced.
Repeat this process for the middle and top shelves, working your way up. Use clamps to hold each shelf in place while the glue dries if you need extra stability.
The key here is to work carefully and check that each shelf is level before nailing. A small mistake gets magnified when you’re stacking three shelves.
Step 5: Sand Everything Smooth
Once all the glue has dried completely (I recommend waiting at least an hour), it’s time for a thorough sanding session.
Start with 120-grit sandpaper to smooth any rough spots and ease all the sharp edges. This is especially important on the front lip of each shelf where you’ll be reaching frequently.
Progress to 180-grit for a smoother surface, then finish with 220-grit for a silky feel. Pay extra attention to the top and side edges of the backboard since these are highly visible.
Sand in the direction of the wood grain to avoid scratches. Take your time with this step because proper sanding makes a huge difference in the final appearance.
Step 6: Apply Your Finish
I wiped down the entire rack with a tack cloth to remove all sanding dust, then applied my finish of choice.
For this project, I used a natural Danish oil finish because it enhances the wood grain beautifully and provides good protection. Two coats were perfect.
You could also use polyurethane, lacquer, or even just a simple paste wax depending on your preference. Whatever you choose, make sure it’s food-safe since this will be near your spices.
Apply the finish with a brush or cloth according to the manufacturer’s directions, let it dry completely, then lightly sand with 220-grit between coats if needed.
The second coat really makes the wood come alive and gives you that professional furniture quality finish.
Step 7: Add Mounting Hardware
Flip the spice rack face-down and mark where you want your keyhole hangers. I placed mine about 4 inches from each end of the backboard for balanced support.
Trace around the keyhole hanger, then use a chisel or router to create a shallow recess so the hanger sits flush with the back. This ensures your rack hangs flat against the wall.
Attach the keyhole hangers with small screws, making sure they’re secure.
Now your spice rack is ready to hang! Find the studs in your wall if possible, or use appropriate anchors for drywall. Level it carefully before marking your screw locations.
Once mounted, step back and admire your handiwork. Load it up with your favorite spices and enjoy your newly organized kitchen!
More Handmade Kitchen Projects
Looking for additional DIY projects to beautify your kitchen and make thoughtful gifts?
Here are some complementary projects that pair wonderfully with this spice rack:
- Wooden cutting boards in various sizes
- Magnetic knife strip made from walnut
- Rustic wooden utensil holder
- Floating shelves for cookbook storage
- Handcrafted wooden recipe box
- Custom pot lid organizer
Each of these projects uses similar techniques and tools, so once you’ve mastered this spice rack, you’ll have the skills to tackle them all!
Don’t forget to save this project for later by pinning it or sharing it with your woodworking friends!
Until next time, happy building!